How to Clean a Freezer in Five Simple Steps

Updated: Apr. 13, 2023
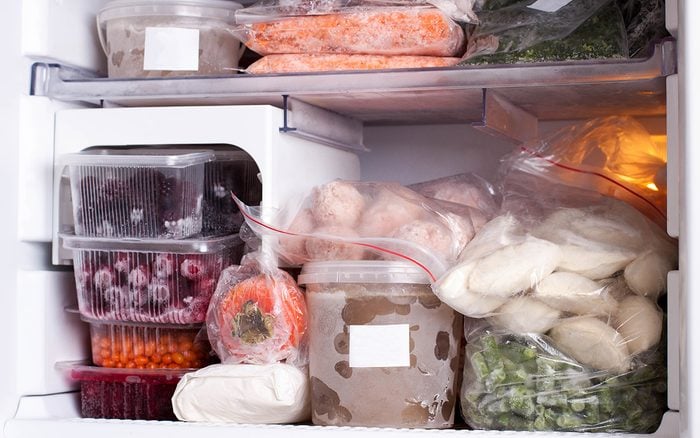
The refrigerator's forgotten sister, the freezer, is often neglected. But to keep it running at peak performance, you'll want to learn how to clean a freezer every week.
Just like a messy fridge, your freezer gets unorganized, overcrowded and in need of a good cleaning. But the freezer can be intimidating to clean. Do you have to empty it out? Thaw it completely? How do you clean frozen spills?
The good news is it’s not as difficult as you might think. We’re walking you through how to clean a freezer in a few easy steps that will help you get it done quickly and efficiently. (Then you can get to the fun part—freezer organization!)
How Often Should You Clean Your Freezer?
Weekly and monthly maintenance help keep your freezer organized and at peak performance.
- Weekly: Wipe down the freezer. Once a week, simply wipe down the shelves and nooks and crannies of your freezer.
- Monthly: Take inventory. About once a month, you should take an inventory of your freezer contents. Because freezers are for long-term storage, you might encounter food items that have spilled or deteriorated over time. Toss any unidentifiable leftovers, items that have freezer burn or foods that don’t seem appetizing any longer. Make sure you consult our guide to freezing food, too.
How to Clean a Freezer in Five Steps
Tools and Supplies


- Large cooler: When cleaning a freezer, you don’t want any of your food to go to waste! Fill a large, insulated ice chest with your vacuum-sealed steaks and pints of ice cream.
- Bucket: A cleaning staple, a bucket is the perfect vessel for holding hot, soapy water.
- Dish soap: A few drops of Dawn Powerwash will leave your freezer sanitized and sparkling.
- Scrub Daddy sponge: Yes, Scrub Daddy sponges are worth the hype. These special sponges stay firm in cold water and become soft in hot water.
- Small brush: Clean every nook and cranny of your freezer with a small, deep-clean scrub brush. An old toothbrush works in a pinch, but you’ll need to sanitize it in boiling water before using.
- Microfiber cloth: When you’re done cleaning, use microfiber cloths to give the freezer one last wipe.
Directions
Step 1: Remove the contents
Empty the freezer and move all the contents into the large cooler or ice chest to keep them cold while you work. This is also a good time to throw away any expired items.
Step 2: Wash baskets and shelves
If there are any removable baskets or shelves in your freezer, remove them and wash them in the sink with soap and water. Set aside to dry.
Step 3: Wipe down the interior
Fill a bucket with hot water (the hotter the better—this helps thaw frozen spills as you clean!) and a couple drops of dish soap, or use vinegar if you prefer. Dip the sponge in the solution and wipe down the entire interior of the freezer. We like to use a Scrub Daddy for this step since the sponge is temperature-resistant.
Step 4: Scrub, scrub, scrub
Use a small scrub brush to clean stubborn or sticky stains.
Step 5: Wipe dry
Do a final wipe with dry microfiber cloths. It’s important the freezer is dry because any leftover moisture will freeze on the interior surfaces.
How to Deep Clean a Freezer
Monthly cleaning of your freezer takes less than an hour, and you don’t even need to unplug your freezer to get it done. However, about twice a year it’s a good idea to deep clean your freezer. The process is the same as the steps above, but you should turn your freezer off so you can defrost it and clean the coils.
- Defrost: If you have any frost buildup, open the freezer as wide as possible and allow it to melt. Place towels on the floor to absorb any dripping water. You can speed up the process by placing a bowl of hot water in the freezer. After you remove the softened frost, continue with the steps above, including wiping down the interior with soap and water. To sanitize the freezer, use a solution of one tablespoon of bleach in one gallon of water.
- Clean the coils: Check with your manufacturer for the location of the coils, they’re usually located on the back or near the bottom of the appliance. Dust and dirt can accumulate on the freezer coils and impact the temperature of the freezer. Vacuum the coils with a soft brush attachment to remove gunk and grime, then vacuum up any debris that falls on the floor.
How to Clean a Chest Freezer
According to GE Appliances, a chest freezer should be cleaned at least once a year. Start by emptying the freezer. Make a solution using one tablespoon of baking soda and one quart of warm water. Dip a sponge in the solution and clean the chest freezer, then dry thoroughly. Pay special attention to the door gasket and all the plastic parts.
Originally Published: August 12, 2019